One of our TSA events includes making a promotional pin for the Technology Student Association in the state of Iowa. For this event, we are trying a new program this year — Pixlr.com.
We’ve had one group of students go through the process so far. Some of the students have taken to this new program really well, and, fortunately, they have helped the other students and me learn to use it. There will be four more groups of students rotating through this workshop, so I’ve written my notes to help them with the process.
Here is how I used Pixlr to make my sample of the promotional design, along with the write-up about how I did it.
We learned quite quickly that the Advanced editor was the best for our purpose.
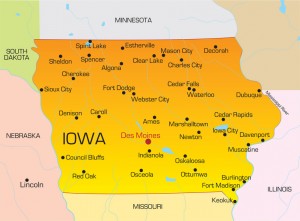
Next, I found a map of Iowa on our subscription clipart service. I really wanted an outline map, but I started with this one, knowing that I could edit it on Pixlr. I wanted to see what I could do with this new program. I downloaded a size just under 1000 pixels* onto my desktop.
Next, I went to Pixlr and opened Pixlr editor (Advanced) and clicked “Open Image from Computer.” I browsed the desktop for the image, and opened it. Then I used the wizard tool and deleted as much of the background as I could.
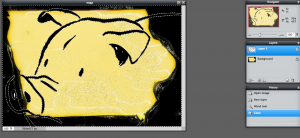
Next, I spent some time and experimented with different tools to get the map like I wanted it. I used the bucket to fill in gold and black. I chose Hawkeye colors because they represent Iowa for me. I also tried some other tools to add texture. I added a thick line around the border of Iowa. I really did experiment, and sometimes I had to use the history and start over. Here’s how it looked after I finished:
Now I was ready to add other things to it, so it could more fully represent Iowa. I chose corn, a steer and a hog — three of our major exports. I found these images on our Clipart site too, and downloaded them to the desktop.
To add another layer to Pixlr, you go to the menu bar and choose LAYER > Open Image as Layer. Then you get something scary like this:
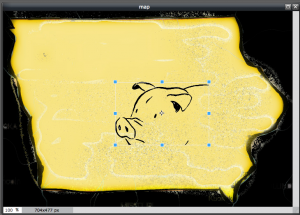
Next, I had to take that white background off so we could see the Iowa map and resize it so there would be room for the others. First, I used the wizard tool again to remove the white. Easy! For this image, it just took one wave of my magic wand.
Next, to resize, you go to EDIT > FREE TRANSFORM, then you can grab a corner. Important: make sure you hold the SHIFT key down while you resize. Otherwise, you will distort the proportions of the image. (Annoying, and a fatal error if you do it to the TSA logo.)
I repeated with the corn and steer. Then I noticed that the corn had a darker outline, so I took the pencil tool and went over the lines on the hog and steer, so they would show up more strongly on the small pin.
When switching between layers, I had to remember to be clicked on the correct layer I wanted to work on. Like in this screenshot taken from the right-hand side of the screen, I’m clicked on Layer 3, which is the steer.
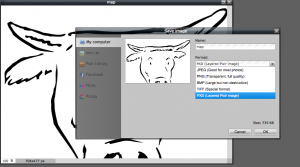
I worked on each layer separately, including the required TSA logo and IOWA text, which can be a separate layer. Because it took several class periods before I finished, each day I needed to keep a workable file, which is an editable PXD file. Save like this:
Finally, I finished and then I needed to save it as a JPG file, so I could have all the layers together. Here is my final product:
Even if you aren’t making a promotional design for TSA, I hope you’ll take time to have some fun with Pixlr.com.
Here is my sample two-page promotional design. I used Open Office to make the file, and then I saved it as a PDF. You’ll do the same if you enter the Promotional Design event in TSA.
*For each image I downloaded, I was sure to pick a size in the same range. I used about 700 pixels, but I think anywhere between 600-1000 would be good.


Thanks for sharing this wonderful information with the rest of us. I love to play with my photos. I also will be using this information in my power points for my future classroom. Once again, thanks for sharing.
Stacy,
You are welcome! Thanks for telling me. I am happy to share with others, as you share with us!
Thanks,
Denise